Want to make halftones in illustrator?
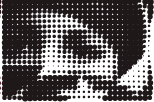
You could go the auto trace route, or you could go with a plug-in from Phantasm. The Phantasm plug-in is powerful and gives you great control, so I do recommend using their product, but if you're on a tight budget, you can try my new script which is easy, and free.
First off, if you don't know about the "Mosaic Filter" in Illustrator, read this quick article. The Mosaic Filter is an amazingly under-used feature and it will do most of the heavy lifting for us today. Filter>Create>Object Mosaic
I will review the steps, but the above link is a detailed and well illustrated walk-through of how to turn an embedded image into an "object mosaic". (a pixellated looking collection of path items). You can mess with the settings, but be sure to check "Delete Raster" or at least remove it manually before running my script.
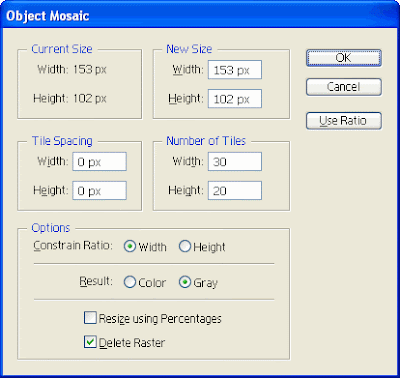
So, first of course you need to find an image.
 The image I'm using here is iStock_000008518543.jpg from iStockPhoto.com.
Note: You'll get a better result if you "pre-pixellize your image in
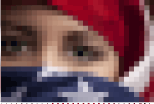 Photoshop, but if you're just goofing around with this tutorial, you could just skip that step and embed your image directly into illustrator and apply Filter>Create>Object Mosaic.
Be sure to actually embed the image, and not just link to it, or this step won't work.
Now, just ungroup your new Object Mosaic , select all the pieces, and run my "Resize on Luminance" script and decide if you want your image to be against a black or a white background.
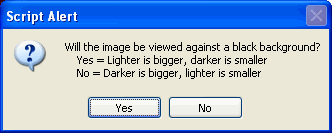
(The script doesn't actually add the background, it just reverses the dot sizing, see the images:
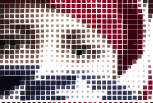 This is the result for the image processed for display against a white background.
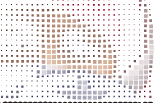 This is the same image but processed inversely. Not so pretty now, but watch what happens when we drop it onto a black background.
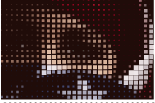 Tada... Magic.. Ok, now you get the process I think, let's move on.
When you hit enter, a progress bar will come up and you can probably go get yourself a cup of coffee. The demo image here was a 20x30 pixel object which contained 600 pixel elements. On my machine, that took a good 25 seconds. If you have a 100x100 pixel mosaic, you're looking at ten thousand objects, which will take the JS engine quite a bit longer to chug through.
Really, that's the end of the tutorial, you can experiment from here.
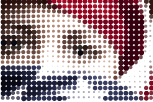 You could convert all the objects to circles using Effect>Convert to Shape>Ellipse,
 You could select all the pixels and turn them black (or white if that was your choice)
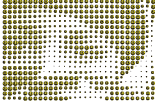 Since the image data is now based on Size instead of color, you could even run my copyToMultipleObjects script and replace all the pixels with a Symbol.
Pop me an email if you use the script in any cool projects and I'll link to you in my new twitter feed @JS4AI. :)
cheers,
-J


13 comments:
This is amazing. Thank you so much!
Finally. LOVE the ability to do this in vector finally (without craploads of manual work or praying some autotrace function works today).
A hint for if you just need the zoomed-halftone effect in raster: Everything is still printed halftone. Muss about in photoshop, send to your laser printer. Scan the results. Zoom as appropriate. Ta da! The randomness of really zooming in can work well for certain projects where a lot of the ordered, computer-generated ones need work to look "right."
Thanks for the 'color random' script. You've given me a leg up on scripting for Illustrator, and you've also given me a way to do hexagonal versions of the random tiling I describe here:
http://www.digitalartform.com/archives/2009/05/make_a_maze_in.html
For your 'size by luminance' plugin, (on-black-bg variant) I didn't look that closely, but you may want to make a second pass and brighten your shrunken tiles by 1/luminance, so that you don't doubly darken already correctly-valued tiles.
I had a similar issue here:
http://www.digitalartform.com/archives/2004/12/history_of_phot.html
Hi!
Thanks for the script, I tried it on a test image and it worked great! However, I tried using it on a rasterized vector shape, a gradient in a rectangle shape to be precise, and I keep getting this error message:
Error 1224: Numeric value expected
Line 89:
-> ob.width*=gray
Could I make the script work for this situation? I'm trying to illustrate "density" according to a gradient of color... Thanks!
I'll take a look at the code and let you know if it's fixable. Sounds like it might be a "Plug-in" issue which is a Javascript no-fly zone. :(
If you need the effect, it should still work if you export the image to photoshop and then re-import as raster.
Great script - only thing I'm having issues with is with memory. I have a 70x109 grid mosaic, and my quad w 6gb won't handle it :(. I have to do it a few rows at a time to get it to work.
Is that an Illu issue or do you think there might be a way to optimize the memory handling of the script?
Hey, thanks for the comment Dengel. I've already tried a few different approaches to optimization, but Javascript for AI is painfully slow for this sort of calculation.
It should still work on large sets of data, although it will take a long time to process, and will probably LOOK like it's locked up.
Id suggest just working in smaller blocks unless you want to let it run overnight.
best,
-J
Trying to download this script but am getting an HTML document and not a jscript document. Am I doing something wrong?
When I download this file, it is an HTML document and not a .jsx file. Am I doing something wrong?
If you're getting code, then instead of directly clicking on the link you need to right click the link and select 'save as' and it should work for you...
Hi, i’m trying to use this with Illustrator CS5 (in German). After the question if it’ll be used on black or white there’s a error message “Some objects were not understood”. If i said black the image shrinks to nearly invisible, if i said white it shrinks only a little bit.
Do i have to change something in the script for using it with german Illustrator or is it more complex, eg. due to new version CS5?
Are you using RGB, CMYK colorspace?
What objects are you working with?
Send me a test .ai file, and I can troubleshoot.
thanks,
J
Hi!
Thank you for this script, but, i can't handle it. I manually create a small grid of severall object, but when I run it, it simply scale by half all the objects whatever the background is black or white (I tried with a png, jpg and bmp embeded image... doesn't work!)
Thank you for any explanation...
Post a Comment